
Traditional sourdough
Based on NYT Cooking & Sarah. This may seem daunting at first, and it is a two or three-day endeavour, but it’s really not as demanding as it might appear. It’s so worth it, give it a go!
After doing this for a while, I keep adjusting this recipe. Here are some additional things I’ve discovered:
I often use a range of amount of starter, the cooler it is, the more I use. Often between 125-140g.
If your starter is alive and well, I only feed it once at bedtime, the night before I want to make the dough. By morning it’s perfect. No need to double feed if you have a strong healthy starter as suggested below in the recipe. If you’ve left yours unattended for a while, double feeding is a good strategy.
Your loaf will be easier to handle and rise easier if you just use white unbleached flour. Whole grains make it more dense. It’s lovely, just different.
Bulk ferment time depends on so many things. Don’t rush this. I was worried at first, but now my average time ranges from 4-8 hours after the last coil fold. Depends on how much starter, temperature, flours. Just wait until it’s super jiggly, when you touch the top with the palm of your hand it doesn’t stick, it’s domed on the top, and when you use your fingers gently to pull the dough away from the side of the bowl, it doesn’t stick. Comes out of the bowl easily.
2 loaves
700g bread flour
300g mix of whole grain flours
200-250g ripe starter
700g lukewarm water
20g salt
1 loaF
350g bread flour
150g mix of whole grain flours
100-125g ripe starter
350g lukewarm water
10g salt
Day One: Prepare the active mixture
If your sourdough starter is in the fridge, decant approx. 100 grams for two loaves (60 g for 1) of it into a clean, clear container. Stir in 100 grams (60 g) of room-temperature water until the starter is evenly mixed then stir in 100 grams (60 g) of white flour until you have a smooth paste – you have fed your starter.
Cover the container loosely with a lid and let sit at room temperature. It will bubble a lot and usually doubles in volume so make sure there is room for that! Normally this takes 4 or so hours depending on your kitchen’s temperature. Leave out overnight. If your starter is kept on the counter, you can skip this and go to day 2.
Day TWO: Mix and Rest Your Dough
If your starter is on the counter you can feed it first thing in the morning the day you make your dough, as above.
Feed your starter again in the morning. Once it is bubbling, about 2-4 hours later, weigh out your active starter in a bowl. Add lukewarm water (I used filtered water and warm it in the microwave) and stir until the starter is well incorporated. Then add the white bread flour and mix of whole grain flours (rye, ancient grain, red fife etc.) & mix until there are no dry spots. It will be shaggy and sticky. Cover with a damp dish towel, and let sit at least 45 minutes to 1 hour.
Sprinkle salt across the dough, and pinch/mix to incorporate. You can mix the salt with a touch of water to dissolve it. Sometimes this is easier to incorporate. Cover with a damp towel and let sit for 10 minutes.
Mix the dough. Slide a wet hand down along the inside of the bowl and underneath the dough. Grasp a handful and stretch it upward until you feel resistance, then fold it back onto the dough mass. Repeat this motion continuously for 10 minutes, rotating the bowl about 90 degrees each time. As you work the dough, it will progress from very slack and sticky to smoother and more elastic. This can be done in a stand mixer with a dough hook on the slowest setting.
Prepare for the dough’s first rise (bulk fermentation). Cover the dough with a damp towel and let sit for 60 minutes.
Fold the dough. For the first set of stretch-and-folds, slide a wet hand down along the inside of the bowl and underneath the dough. Grasp a handful and stretch it upward until you feel resistance, then fold it back onto the dough mass. Repeat this motion 4 times, rotating the bowl about 90 degrees each time. Let rest for 30 minutes. Now switch to coil folds. Use your wet hands to pick up the dough from the middle of the container or bowl, lift it about a foot high, then let one edge fold under to the center of the bowl. Rotate the bowl 180° and repeat a second time. Then rotate the bowl 90° to lift and fold one of the short sides. Finally, rotate the bowl 180° and fold the remaining side under. You should have a neatly organized ball of dough in the middle of the bowl. Cover the bowl, wait 30 minutes, then repeat every 30 minutes about 3-4 times in total. The dough will become easier to handle and tidier as you go along and will rise up between stretches.
Now let the dough rest under a damp towel or cover until the dough feels pillowy and filled with air. It will increase in size, 50% to 75% larger, you’ll see bubbles, it will be domed and not too sticky to the touch, and ready for the first shaping. This can take anywhere from 3-8 hours depending on the temperature of your house. I normally leave it 2.5-3 hours to start, then check on it hour by hour after. Roughly mine is ready in 4-6 hours.
Shape dough for the first time. Lightly flour a work surface. Gently turn out the dough, letting its weight coax it out of the bowl and loosening the sides with the bench scraper. If doing two loaves, divide the dough in half with the bench scraper first. Using lightly floured hands and working with one piece of dough at a time, gently pull all the edges of the dough toward the centre to create a round, tidy packet with some good surface tension. (The non-floured surface will readily stick to itself.) Use a bench scraper to turn the loose ball of dough over so it rests seam-side down. Cover with a clean towel (repeat with the second half of dough if doing two). Let dough rest, covered, on the work surface for 20 minutes.
Line a mixing bowl with a clean tea towel or prepare your banneton baskets. Stir together a 50/50 mixture of white bread flour and rice flour. (Rice flour will prevent sticking.) Dust the interiors of the baskets generously with the 50/50 flour mixture. Using a bench scraper, swiftly lift the dough and flip it over to do a second shaping. For a loaf shape (not a boule) create a rectangle of sorts, and fold in the sides, then the bottom. Then roll it up like a log. Pinch the ends and place the dough ball inside the basket, seam side up and cover. Leave for about 1 hour to settle. There are lots of videos on how to shape and create tension like this one here.
Chill the dough. Dust the dough with the 50/50 mixture of flour, cover the bowls/baskets with plastic wrap and transfer to the fridge. Chill overnight and up to two days before baking. The longer the dough spends in the refrigerator, the tangier the final bread will taste. You can bake the dough at this point as well, the flavour will be less tangy.
Day Three: Bake
Put a large Creuset pot with the lid in the oven at the highest temp (475° or 240°) while pre-heating the oven. Some call for doing this for 1 hour prior, I find it works fine to just use the pre-heat time to warm the cast iron.
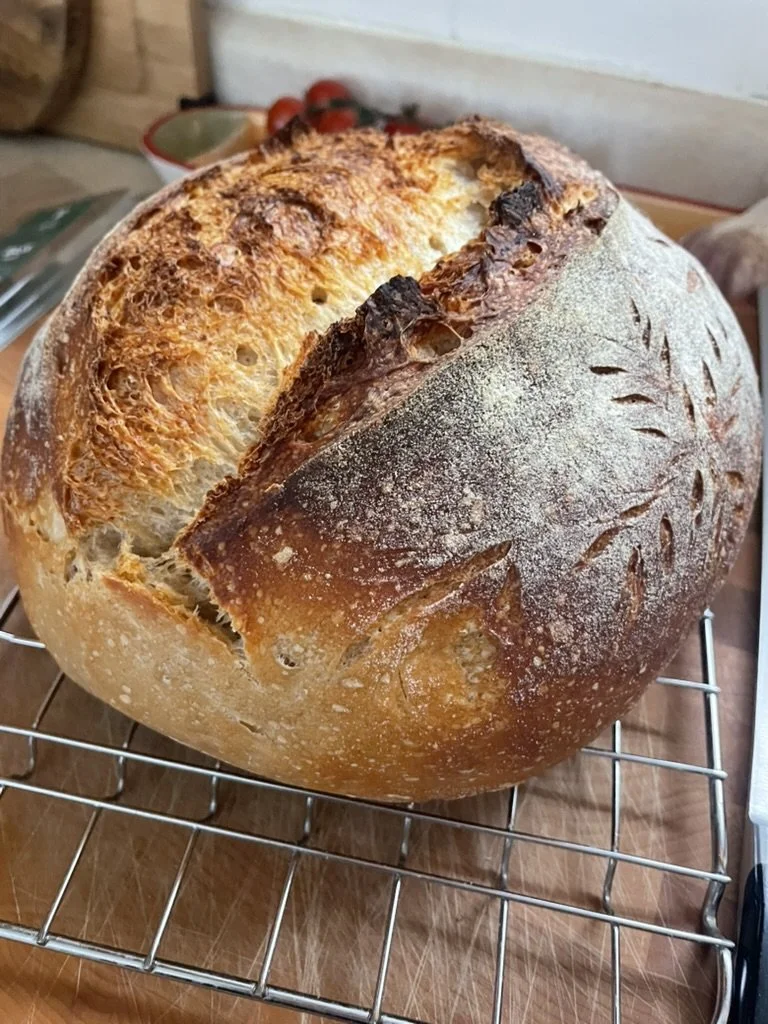
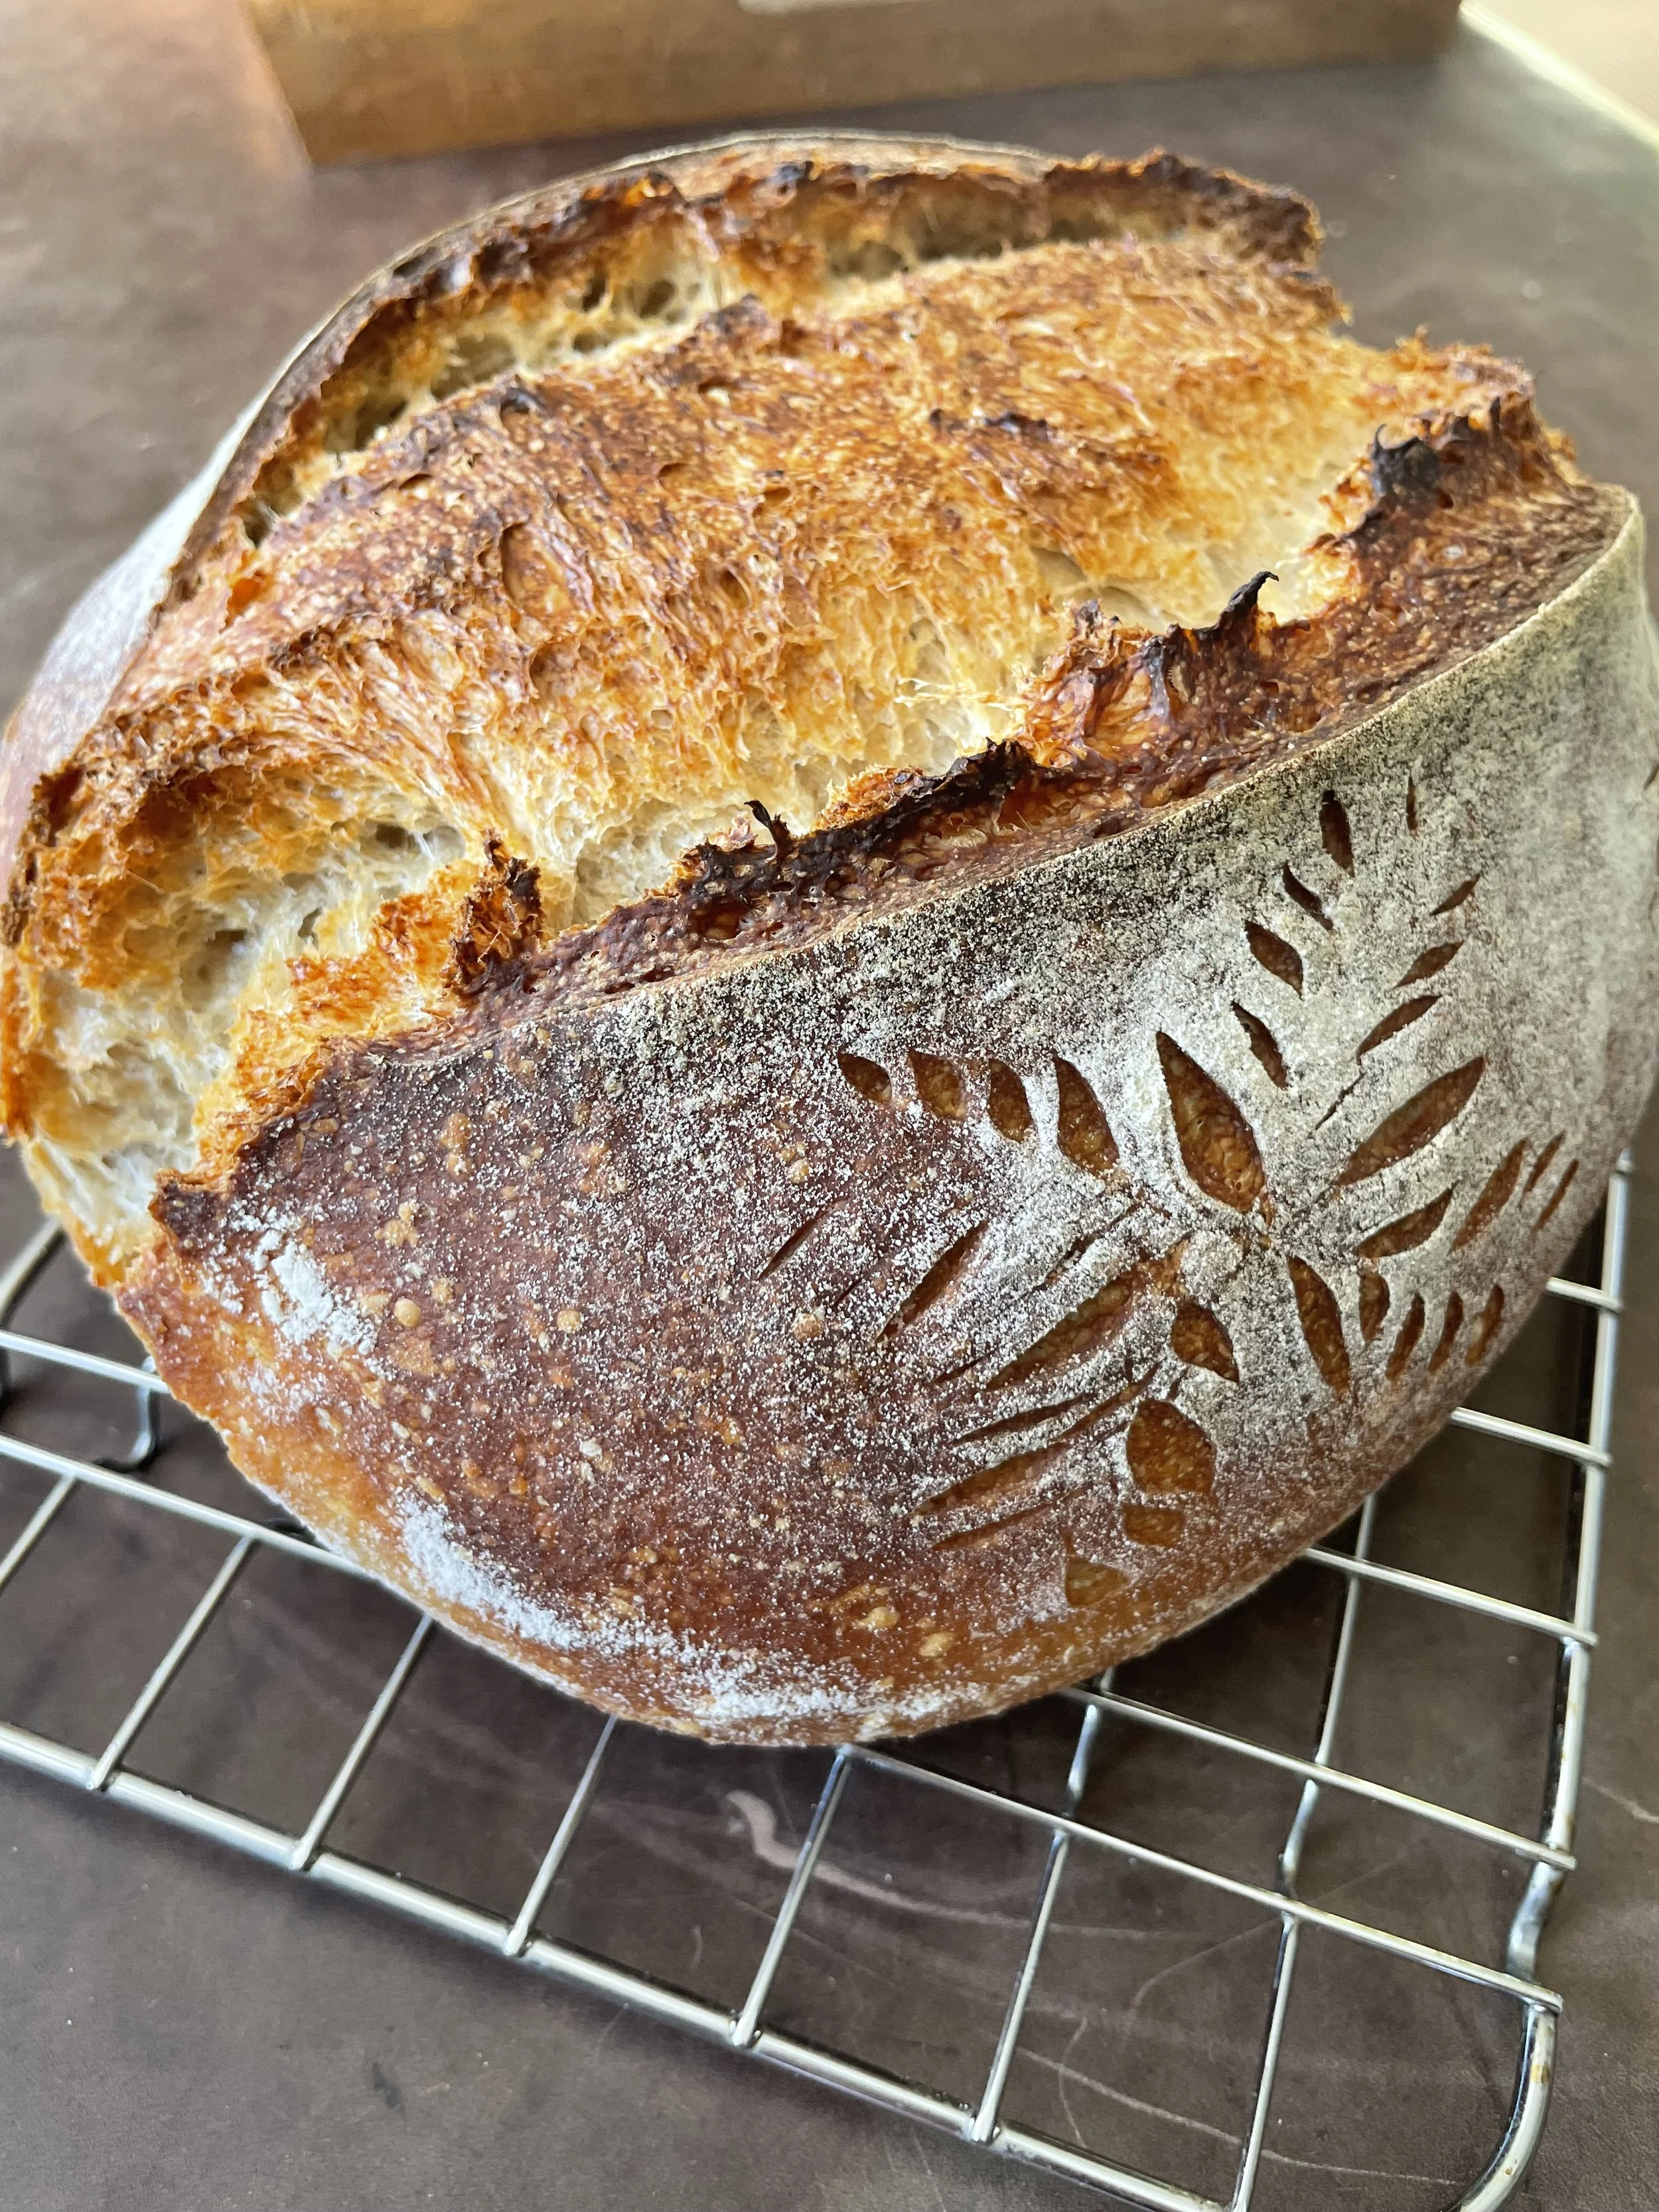
Remove the dough from the fridge just before you are ready to bake. Place a piece of baking paper over the basket, making sure the parchment is longer and wider than the basket by several inches. Invert the loaf onto the parchment paper. Remove the basket, then slowly peel away the towel. GENTLY use a blade/lame or a serrated knife to make a swift, long, slightly off-center slash about 1/4 to 1/2-inch deep, angling the blade toward the midline of the loaf.
Remove the Creuset from the over and carefully the lower dough into the pot with the baking paper. Cover and return it to the oven. Bake for 20 minutes. If you don’t have dutch oven pot, put the bread on a hot baking tray and ensure there is a dish of water in the oven to create a steam oven.
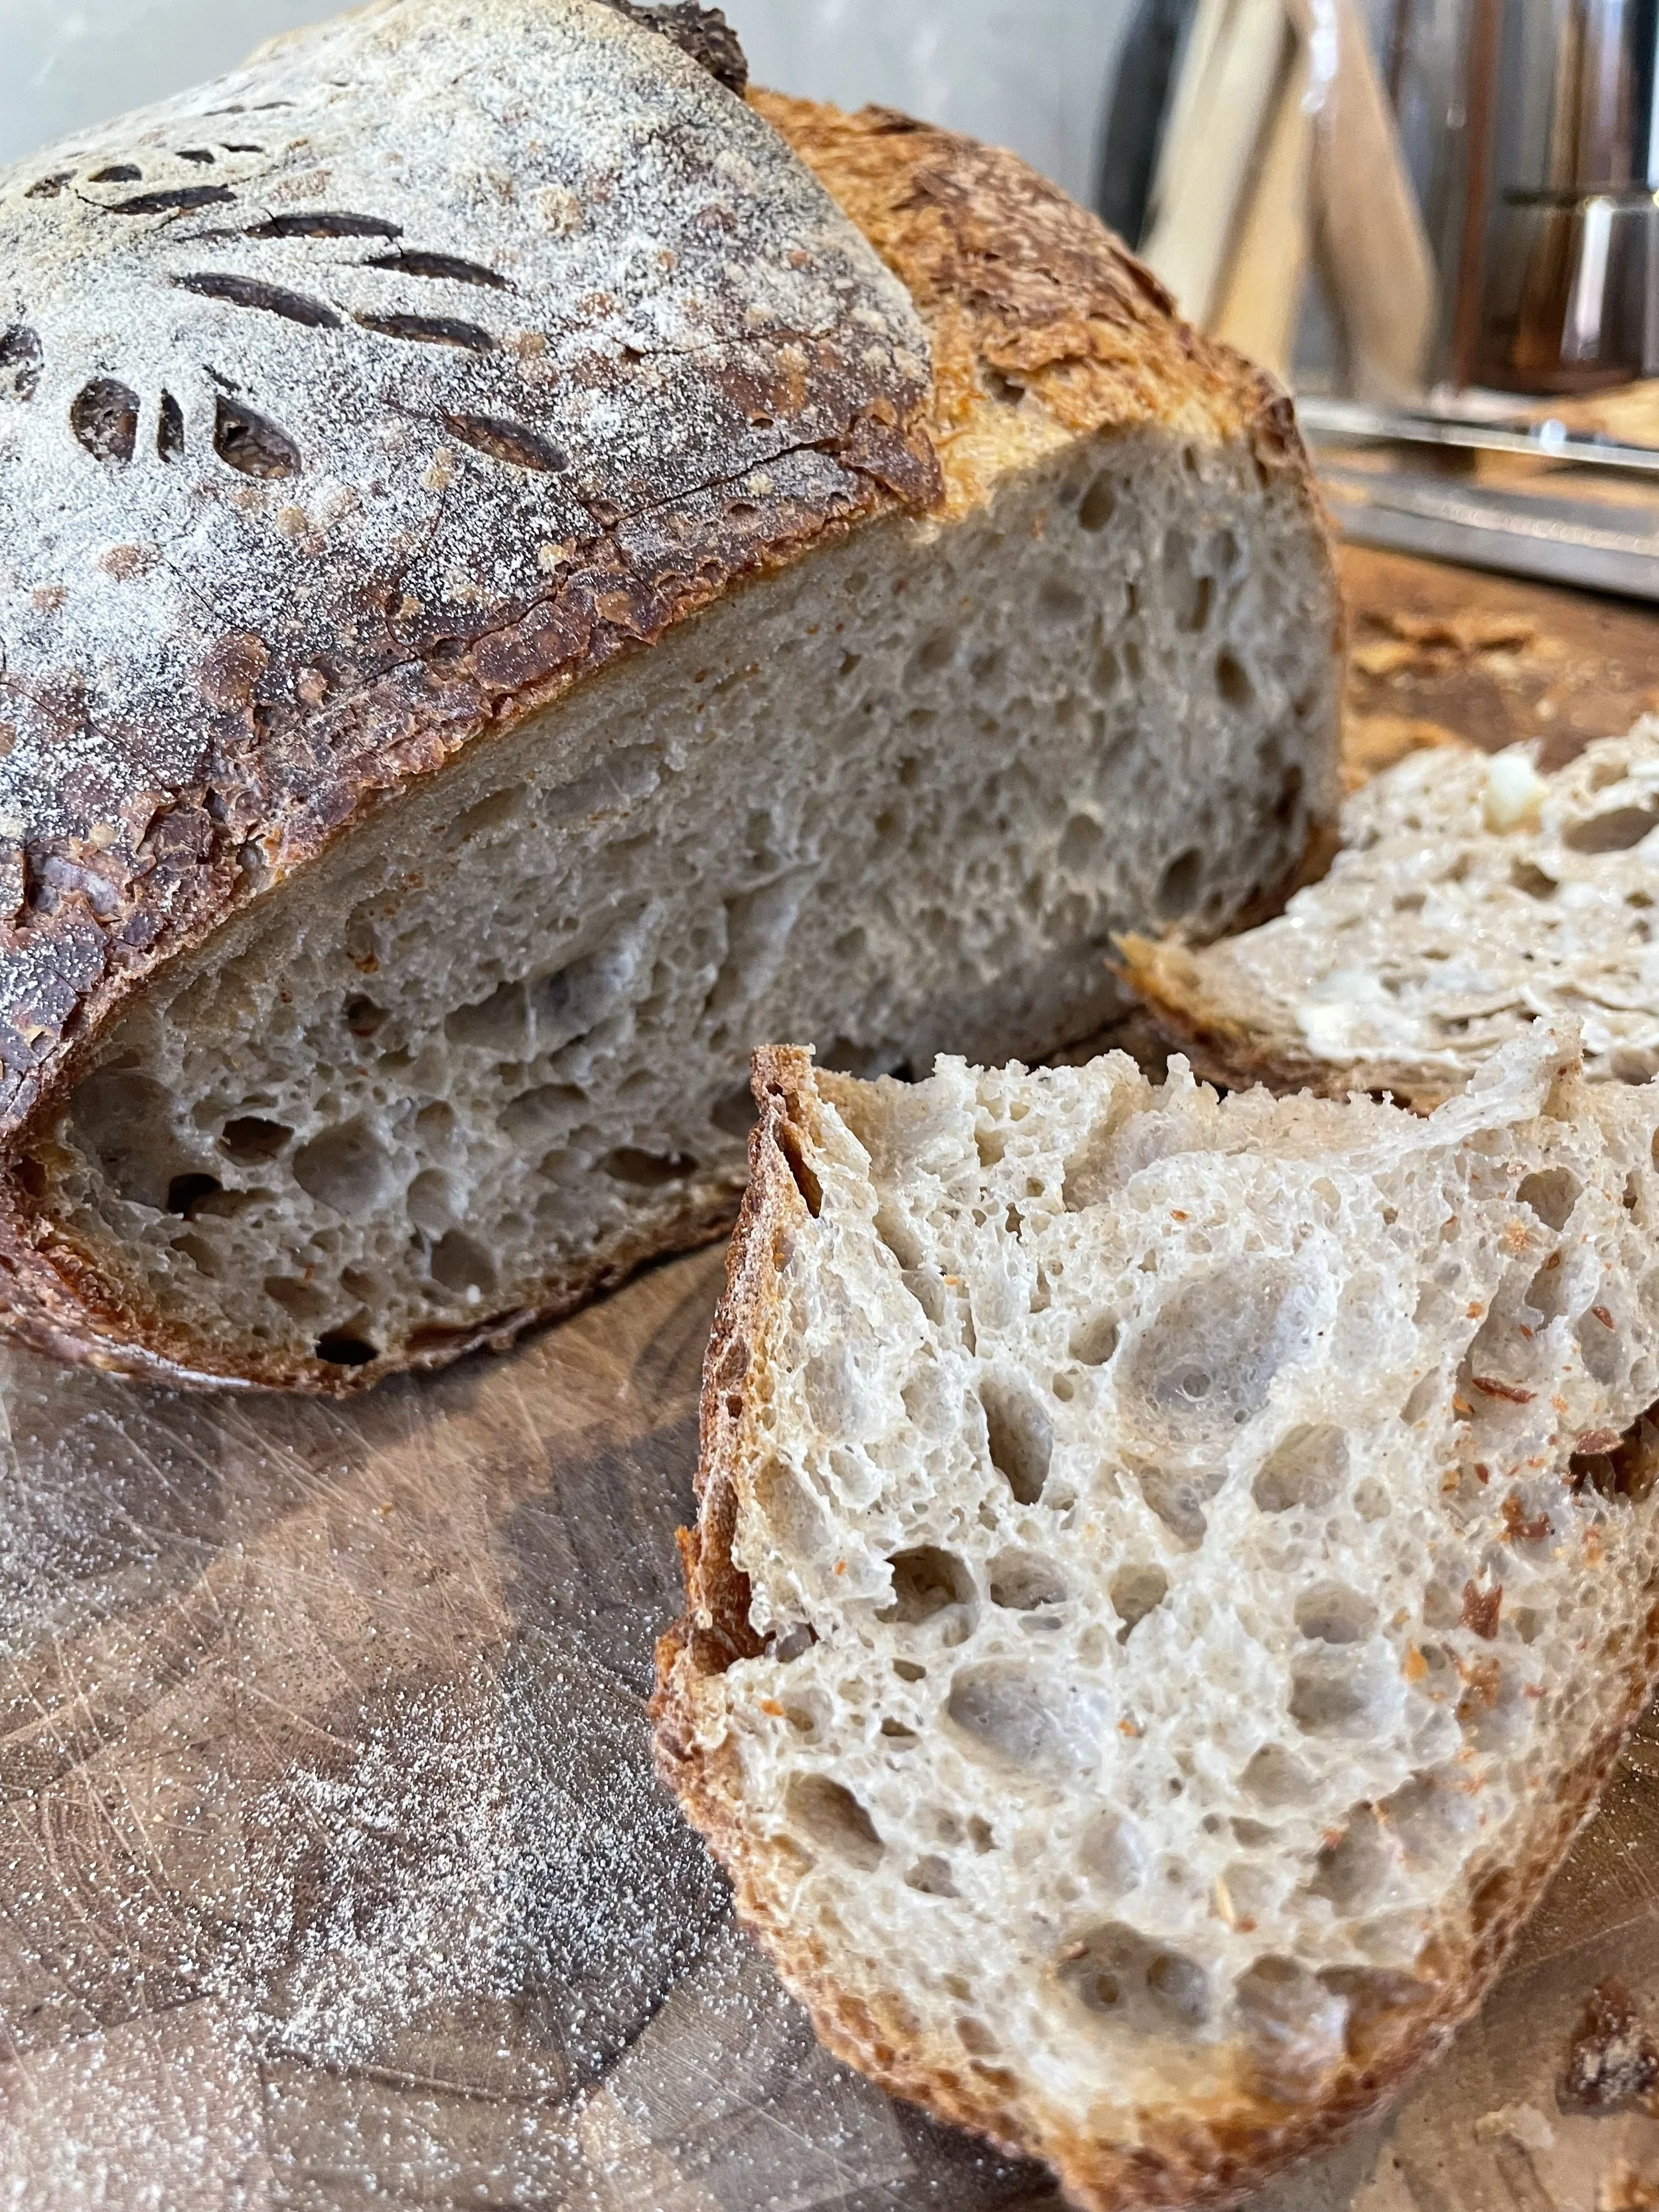
After 20 minutes, reduce the oven temperature to 450F° (220°C) and bake another 25 minutes. Now remove the lid and bake the loaf uncovered until the surface is deeply browned all over, about another 10-15 minutes. Internal temperature should be around 210 F (98 C) or 205 F (96 C) at higher elevations. If you are finding the bottom is browning too much, place a baking sheet on the lower rack under your dutch oven throughout the baking process.
Remove the Creuset from the oven, and carefully pull out the loaf and let cool on a rack. If doing a second loaf, transfer the Creuset oven back to the oven to warm & repeat the process with the second loaf of bread. Wait until completely cooled before slicing.