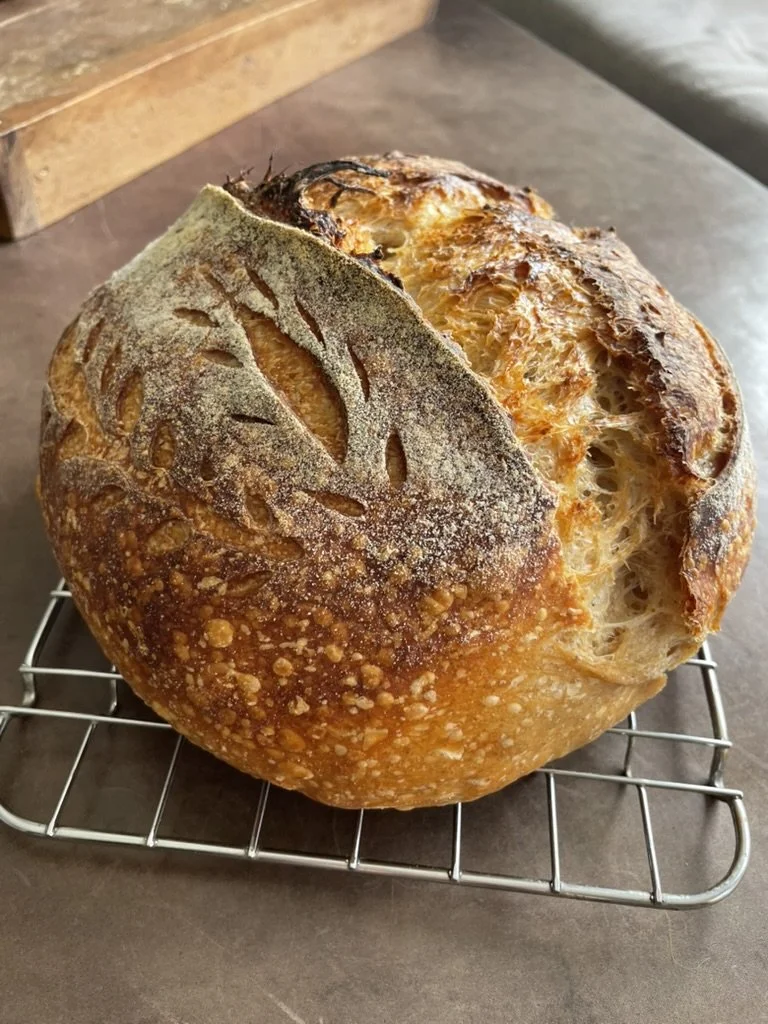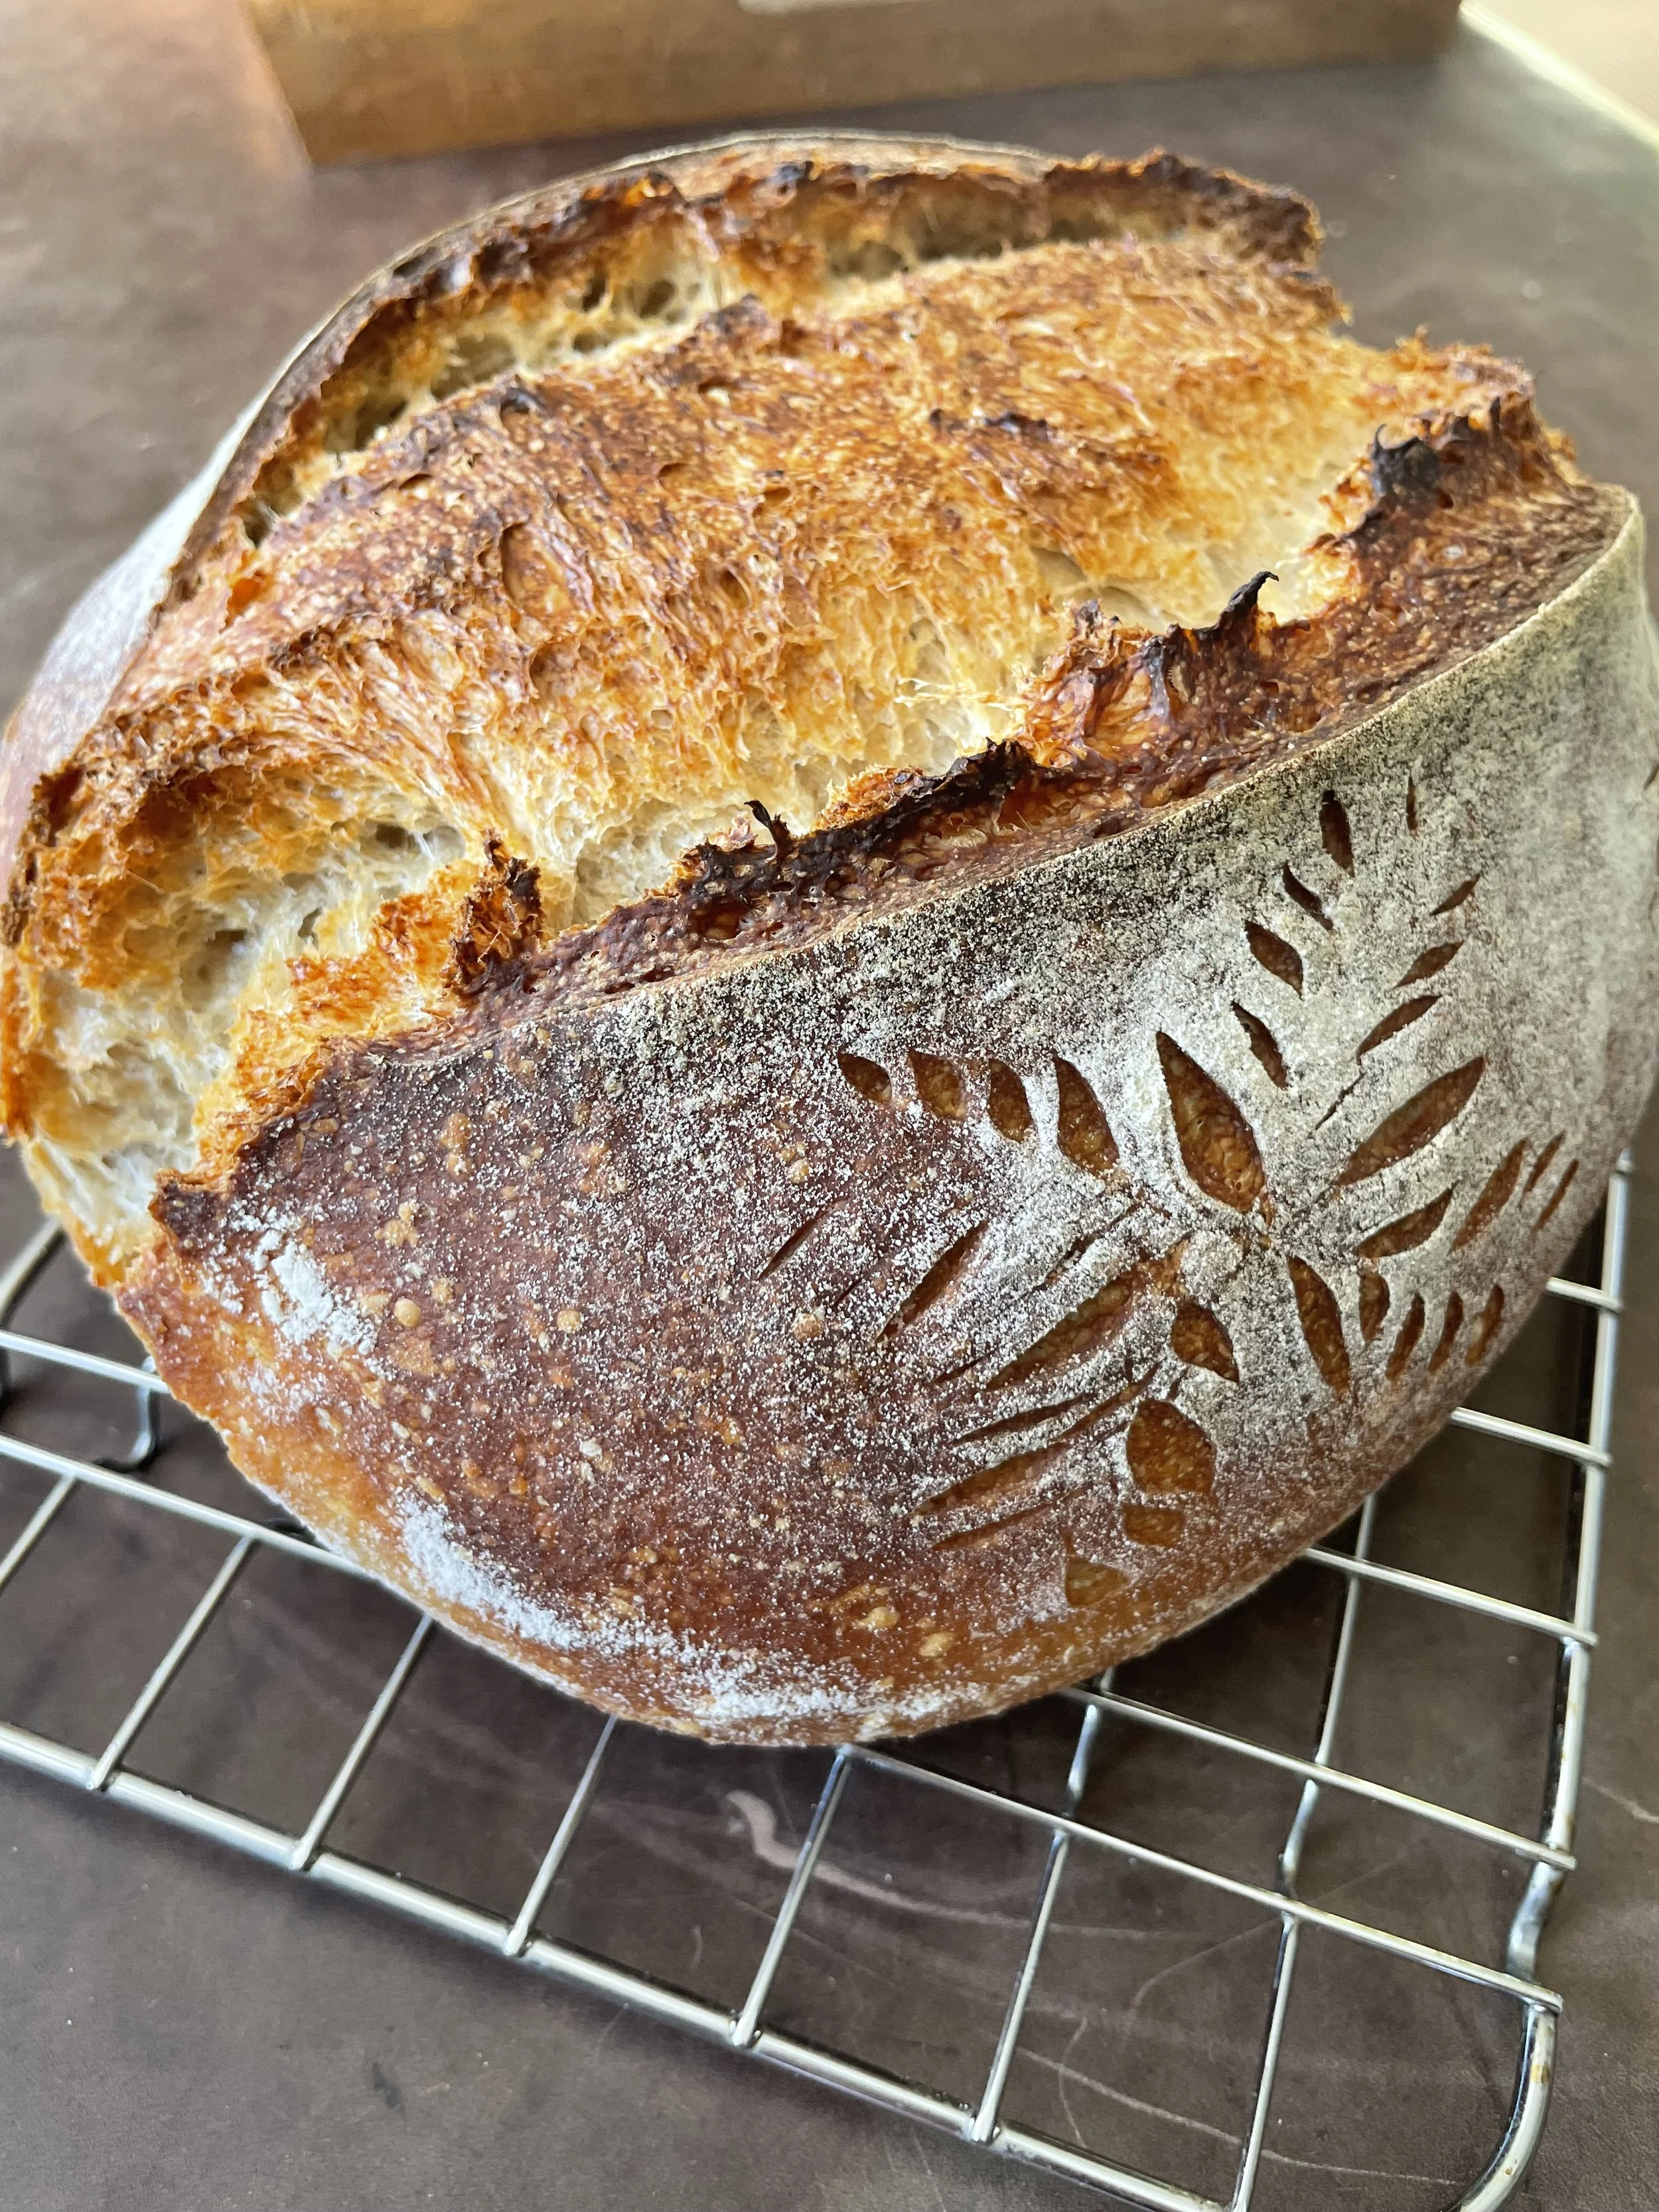
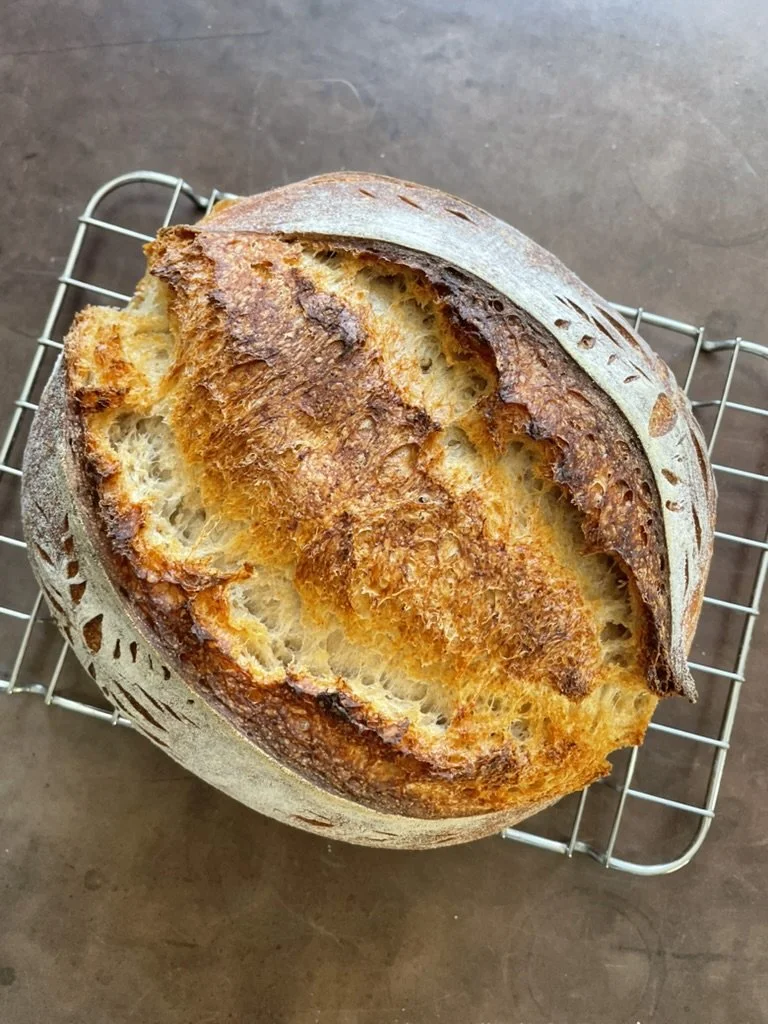
No-Knead sourdough Bread
Based on King Arthur recipe. This turned out quite nice, but I found it spread more. Still a nice chewy texture and interior consistency. If you want an easy, no fuss version, this is the one for you!
2 loaves
700g bread flour
300g mix of whole grain flours
200g ripe starter
750g lukewarm water
20g salt
1 loaF
350g bread flour
150g mix of whole grain flours
100g ripe starter
375 g lukewarm water
10g salt
Day One
In a large mixing bowl, combine the ripe sourdough starter, water, and flour. Mix the ingredients together using wet hands or a dough whisk. Let rest, covered for one hour. Add the salt, kneading the dough with wet hands until combined.
Step Two
Let the dough rise in bulk fermentation.
Cover the bowl and let the dough rise for 3 hours. During this bulk fermentation give the dough three sets of stretch-and-folds: once after the first hour, again after the second hour, and once more at the end of the 3 hours.
For each set of stretch-and-folds, use your wet hands to pick up the dough from the middle of the container or bowl, lift it about a foot high, then let one edge fold under to the center of the bowl. Rotate the bowl 180° and repeat a second time. Then rotate the bowl 90° to lift and fold one of the short sides. Finally, rotate the bowl 180° and fold the remaining side under. You should have a neatly organized ball of dough in the middle of the bowl. Cover the bowl and let the dough continue to rise.
After the third set of stretch-and-folds, cover the container and place it into the refrigerator for at least 8 hours or up to 48 hours (mine was in the refrigerator for 14 hours overnight).
Day Two, Shape & Bake
When you’re ready to make bread, take the dough out of the fridge and scoop it onto a floured work surface using a bench scraper and letting gravity help coax it out of the bowl. Preshape the dough into a round and let it rest for 30 minutes. During this time, the dough will warm up and start to expand outward on the work surface.
Ready your proofing basket (or kitchen bowl lined with a tea towel) by lightly sprinkling on 50/50 mix unbleached all-purpose and white rice flour to help prevent sticking.
Lightly flour the top of the rested dough. Then use lightly floured hands and a bench knife (or dough scraper) to flip the dough over onto your work surface. The dough will feel strong and elastic and doesn’t need much shaping to keep it round.
Gather up the dough by grabbing opposite sides and folding them over toward the middle at the same time (like folding up a handkerchief to hold a package in the middle). After the four sides are brought to the center, flip the dough over and finish tightening the boule as necessary. Using your bench scraper (or tool of your choice), swiftly pick up the dough and place it into the proofing basket, seam-side up. Cover the basket with plastic wrap or a reusable cover and seal shut.
Let the dough rise for about 2 1/2 hours at room temperature. At the end of the proof, it should pass the “poke test” when it’s ready to bake: make an indentation with your floured finger and it will slowly — and not completely — spring back to the surface. If it springs back slowly, leaving a slight indentation, it's ready. If it springs back quickly, it needs more time; if the indentation remains, it's overproofed.
Bake the loaf
About 45 minutes to 1 before baking, put a large Creuset pot without the lid in the oven at the highest temp (475°-500° F or 240°-260°C).
Cut a piece of parchment paper to fit over your proofing basket and place it on top after uncovering it. Then, place the parchment to cover the proofing basket and flip the entire stack over. You should now have the dough on top of the parchment with enough extra parchment to use to move the dough.
Using a sharp blade, or scissors, score the dough. Using oven-safe gloves, take out the preheated Dutch oven and slide the scored dough with parchment paper into the pot. (It’s OK to bake the loaf with the parchment paper inside the pot.) Return the pot to the oven and cover with the lid.
Reduce the oven temperature to 450°F and bake for 45 minutes, then remove the lid from the pot. Bake for an additional 10 to 15 minutes, until the crust is well colored and the internal temperature reads at least 210°F.
Once fully baked, remove the loaf from the oven and turn it out of the Dutch oven onto a rack to cool for at least an hour before slicing.
Notes
For slightly overproofed dough
Bake it as is:
If it still holds its shape, bake it like a normal loaf. The finished bread may be flatter with a tighter crumb and a very sour taste.
Shape it:
Gently fold and shape the dough to build surface tension, then bake it. A loaf pan can help support the dough during baking.
For very slack, unmanageable dough
Make focaccia:
Spread the dough in an oiled pan, add toppings like rosemary and salt, and bake until golden brown. You can also make sweet versions, like an apple fritter or lemon blueberry focaccia.
Make pizza dough:
Flatten the dough into a pizza base. You can use it immediately for pizza, or re-ball it, place it in a container, and refrigerate for a future pizza night.
Make other flatbreads:
Bake it on a baking sheet as a flatbread. It's great for making sandwiches or toast.
Tips for all levels of overproofing
Avoid deep scoring: If you try to bake it as a loaf, score it very shallowly or not at all to prevent air from escaping.
Embrace the texture: The bread may not have the same rise as an underproofed loaf, but it can still be delicious.
Don't add flour: Adding dry flour to overproofed dough can lead to inconsistent results.